Friday, December 10, 2010

My Master Sweet...

For todays post I am going to share some before and afters of my new master suite.  Just in case you've been wondering about my sporatic blogging this fall ... wonder no more.

My lately weekend life

I not only moved my business to Charlottetown but I moved too.  From my house to a condo the same week as I was moving the shop/business (call me crazy).  The totally ironic thing about the above image is that all those boxes are stacked in my "old master bedroom" ready to be moved. 


My condo key

Giving me a fresh new start and an amazing decorating opportunity to put my stamp on this brand new empty space! 


This was my new master bedroom, a totally blank slate.  Hmmm .... need to fill with furniture/make pretty.  I have a nice bed and other stuff but my old place had a dressing room with built in closets.  There was no need for a dresser.  In this new place I needed one.  I sensed a DIY project about to happen as my budget was quickly diminishing ...


Enter the antique sideboard I spied at a local second hand shop.  It had great potential, nice curvy lines, plenty of storage and it was in good shape.  It needed a facelift for sure but at $250 I was sold.  


And so ... with Anita's seal of approval (she had to check it out before I bought it) and with Ashley's help (muscles) we dragged it to my storage room at the new condo and had a painting party.


I even ponied up and bought us huge coffees to keep us going ... however... what really got us into it was good music and...


A supply of cold Coors Light, sometimes cold beer just makes everything seem easier.  Wine does too:)


Here's my painting partner and fellow shopgirl Ashley, removing all the old hardware.  She's a trooper!  I'm in the background sanding the dresser in preparation for priming and taking endless pictures.


1 hour later we had the entire dresser sanded and then painted inside and out with a grey primer.

The huge top drawer

No surface was spared as I wanted it to be clean and fresh inside and out.  In fact, after the dresser was completely painted I lined the inside of all of the drawers with white felt. 


After letting the primer cure for 24hrs it was on to the finish colour. 


I chose semi-gloss black for the finish.  Tip - semi gloss is the perfect paint for furniture finishes.  I forgot to mention I could have had it sprayed but at $275 (OMG really?) I declined and decided (budget again) to tackle the project myself with Ashley's help.


Just for fun I thought I would share what my first few nights looked like.  I call it  "college dorm room chic" bed on floor.  Not really chic at all!!! But functional and hey, I had a bed and bedding. 


Enter my finished master suite... 2 months later... done just in time for some Christmas touches.

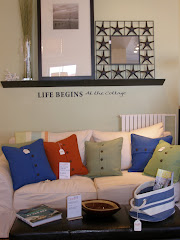
My colour scheme is white, taupe, black, brown, blue, and cream accented with hot pink.  I like mixing it up... with all my favorite colours. 


I had to have this patterned ottoman from my shop, Moving Designz Home & Cottage.  I've been in love with it for while now.  Accenting my room with hot pink? 

It's a decidedly feminine (princess) room, not hard to tell I'm a single gal.  I don't quite think I could get away with this room otherwise :)  But hey, it's mine so why not?  At least until Prince Charming comes along :)


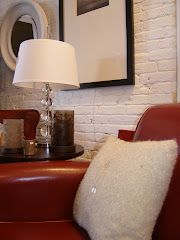
Table to the left...


Table to the right... with white feather wreath above the bed.  Now that was a great find!


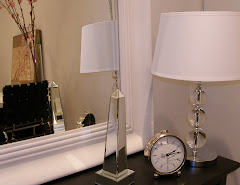
A close up of my bedside table with the lovely carnations(they like last forever) and vase full of pink and silver Christmas bling.

Before view


And my DIY dresser project, here it is with the addition of crystal knob hardware from the shop.  It's the perfect fit!  Total cost with paint and hardware - $475.00.  I still want to add drapes but they will have to wait until the new year.  At least I have real blinds now :)  A fab chandelier would be heavenly too!  Unfortunately there is no electrical outlet for one... drag. 
One last look at the before and after.


I love my "princess" room and sometimes I have to pinch myself to make sure this is real... Bed, bedding, tables, ottoman, accessories, artwork - Moving Designz Home & Cottage. 

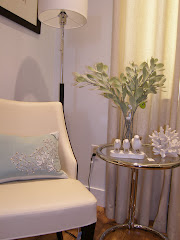
Sneak Peek of my livingroom... a white tree for me.

I'll be posting on the rest of my condo next weekend. 


Thanks for reading.  Have a great weekend!
Susan

Saturday, December 4, 2010

The Condo Project

For today's post I'm going to share a few photos of my condo project as seen through the lens of professional lifestyle photographer Katelyn Fraser. 

Last Friday she took the pictures and on Tuesday I received this series of sneak peek of the images that are being used in promotional material.  She's one very talented gal, see her work at http://www.katelynfraserphoto.com/ 


I think they look fantastic and I can't wait to see how she photographed the entire rooms.  I will have more images of the completed project to share with you early next week. 


Here are a few images of Moving Designz Home & Cottage this week as we head into the holiday season.  Anita, Ashley, Kelly and Trish have it looking so pretty this year in our new space. 

(photo by Susan Snow)

The shop is all decked out with pretty Christmas decorating ideas, bright cheerful displays and fabulous gifts.


I'm loving the Tiffany blue theme this year and planning on a silver,white and blue Christmas theme for my home too :)  The chairs in this picture just arrived late last week.  They are small scale in a soft green colour with lovely button tufting. 


Pretty little gift ideas and stocking stuffers.


I love fresh green for Christmas. 


Some lovely ideas using glass vessels in traditional red.  Note Mr Penguin... my love of adorable penguins continues this Christmas season too!!!  Everyone seems to love them, I think there are only 2 or 3 left in the shop.

Our store hours are extended this holiday season
 Thursday and Friday nights open 10am-7pm.

Thanks for reading.  Have a great weekend!
Susan

Sunday, November 14, 2010

Friday Field Trip

For this week's post it's time for a Friday field trip.  I've been working with the builder on this project since early this year when the large renovation project began.  The building process is almost done in most of the units so we're ready to decorate!!!


Friday was my day on site to complete Loft 4's main living space with furniture, artwork and accessories. 


I was so excited to finally see this empty unit turned into something special.  I still have 3 more to complete ... plus the upstairs living space in this unit  For today I'm going to share Fridays work.  Breathing some life into this empty space.


(Early into the construction process with the shell completed)

This new residential project in downtown Summerside involved converting an old feed mill building into 5 beautiful upscale loft condo units.  The builder is Peter Brown of Bayside Builders.  http://www.baysidegroup.ca/  This man has vision, style and true apprecation and knowledge of the building process.

The SGG house project 2010.

A luxury beach house 2007.

Peter and I have been working together over the years on many projects, including both of the above homes and numerous other developments. 


Not only can his company and team of building professionals build beautiful new homes but they have the expertise to turn an old warehouse building complete with 100 year old (plus) beams into something special.  This is the raw space inside of the feed building before any work began.


The original ceiling timbers pictured above... were salvaged and kept in place, adding rustic charm.


 A few months later and the great room is taking shape,. Gone are the barren slat and lathe walls.


Fresh seaside inspired colours and furnishings.   Can I just say that I would move into this place in an instant?  I only wish it were located in Charlottetown... SOLD!

  
Furniture from Moving Designz Home & Cottage.


Another angle of the livingroom amidst construction.


Now that I've shared the livingroom, lets move on to the dining area.


View to dining nook before.


I want to point out the ceiling treatment between the beams. Look carefully and you will notice the ceiling is finished in beadboard... Loving it!!! Talk about coastal charm.  (and I know that fixture is way too high)


Before and another view, this time with a wider angle.


Let's look at the kitchen now ... I love this space. 


Before.


Ahhh I just love white kitchens...


It's not a big kitchen but totally big on style and use of space.


For more information on this beautiful loft condo please visit:


Unit 5 ... on the To Do list.

Over the next few weeks I will be sharing more images on this fantastic project.


Thanks for reading.  Have a great week!
Susan